
+91-9912355536
support@dentxmart.com


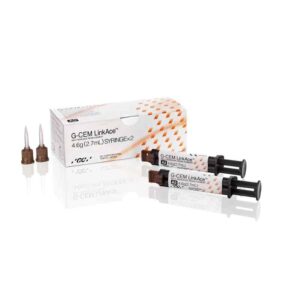

GC G-Cem Linkace-Translucent
Self-adhesive resin luting cement with automix delivery system.
₹7,250.00 Original price was: ₹7,250.00.₹6,325.00Current price is: ₹6,325.00.
MRP Inclusive of all taxes
Buy more save more!
Buy from 2 to 5 items and get 1% OFF
on each productBuy from 6 to 10 items and get 2% OFF
on each product- Free shipping on all orders above Rs. 2,500
- No hassle returns, 10 days return
- Express delivery all over India
Product Details
G-CEM LinkAce, the next-generation self-adhesive resin cement from GC, takes advantage of advanced technology, including an innovative initiator system that ensures fast and safe polymerization. This results in a material that delivers outstanding physical properties and bond strength, while maintaining the ease of use and absence of post-operative sensitivity observed with G-CEM Automix.
Composition:
- Fluoro-alumino-silicate glass: 60-70%
- Urethanedimethacrylate: 12-17%
- Dimethacrylate: 12-17%
- Silicon dioxide: 3-8%
- Initiator: Trace
- Inhibitor: Trace
- Pigment: Trace
Indications:
- Cementation of all types of all-ceramic, resin, and metal-based inlays, onlays, crowns, and bridges.
- Cementation of metal, ceramic, fibre posts, and cast post and cores.
Advantages:
- Provides unsurpassed wear resistance due to small, homogeneously distributed filler particles.
- Ensures reliable self-curing under all materials.
- Contains unique phosphate monomers that chemically bond to zirconia, resulting in a strong and stable bond.
Features
Excess cement can be easily removed in one piece with just a 1-2 second tack cure. The material’s high flexural and bond strengths ensure strong retention, even in cases where a classical preparation is not feasible. Additionally, it is HEMA-free and exhibits very low water uptake, providing outstanding colour stability over time.
Specifications
The working time for this product is 3 minutes and 30 seconds from the start of mixing at a temperature of 23°C (73.4°F). The setting time is 4 minutes after the excess material is removed. For ceramic, indirect composites, and metal-based restorations, a halogen/LED light with an intensity of 700mW/cm² and a wavelength range of 430 to 480 nm should be used. The same intensity and wavelength apply to fiber posts, metal ceramics, and cast posts and cores, with the material needing an additional 4 minutes to set. For cast post and core applications, allow the material to set for 10 minutes.
Contraindications:
- Not suitable for pulp capping.
- May cause sensitivity in rare cases; discontinue use and consult a physician if reactions occur.
- Not intended for filling or core build-up.
Storage:
- Store at room temperature, away from heat, moisture, and direct sunlight (4-25°C or 39.2-77.0°F).
- Shelf life: 2 years from the date of manufacture.
Caution:
- In case of contact with oral tissue or skin, immediately remove the material using a sponge or cotton soaked in alcohol and flush with water. Use a rubber dam or cocoa butter to isolate the area from skin or oral tissue.
- If the product contacts the eyes, flush immediately with water and seek medical attention.
- Do not use with eugenol-containing materials, as eugenol may interfere with setting or bonding.
- Wear protective light shields or eyewear during light curing.
- This product is not indicated for filling or core build-up.
Package Contents
- 2 x G-CEM LinkAce Syringes (4.6g, 2.7ml each)
- 15 x Regular Automix Tips
- 5 x Automix Tips for endodontics (includes 5 x Extension Tips)
Directions To Use
A. CEMENTATION TECHNIQUE for ceramics, indirect composites, and metal-based restorations
- Tooth Preparation
- Prepare the tooth in the usual manner. For pulp capping, use calcium hydroxide.
- Clean the prepared tooth with pumice and water. A clean surface is crucial for optimal adhesion.
- Rinse thoroughly with water and dry the surface completely by gently blowing with oil-free air. The prepared surface should remain dry.
- Note: Avoid substances like H²O², EDTA, and disinfectants, as they can reduce bond strength. Be sure to remove imaging powders completely with pumice and water.
- Restoration Preparation
- Ensure the restoration is pretreated and handled according to the manufacturer’s instructions.
- Dispensing
- Before dispensing for the first time or after long periods of inactivity, bleed the pastes from the syringe.
- Extrude the material directly into the restoration.
- Note: The used mixing tip can remain on the syringe as a storage cap until the next use. Use a new mixing tip for each application.
- Cementation
- Coat the internal surface of the restoration with sufficient cement and seat immediately. The working time is 3 minutes 30 seconds from the start of mixing at 23°C (73.4°F). Higher temperatures will shorten the working time.
- Note: Ambient light can shorten the working time. It is recommended to reduce the intensity or turn off the operation light during the cementation procedure.
- Maintain moderate pressure until final polishing is complete.
- Excess Cement Removal
- Maintain moderate pressure to ensure the restoration stays in place.
- To remove excess cement, light cure using a visible light curing unit for 1 second, or allow the cement to self-cure until it feels rubbery.
- Remove excess cement with appropriate instruments, keeping the restoration in position.
- Final Set
- While maintaining moderate pressure, light cure all surfaces and margins for 20 seconds each (Halogen/LED, intensity: 700mW/cm², covering wavelength: 430 to 480 nm).
- For the following restorations, let the material set for 4 minutes after removing excess cement:
- Metal and metal coping restorations
- Metal-free dark and opaque restorations
- Translucent metal-free restorations greater than 2mm in thickness
- Final Polishing
- If necessary, finish and polish margins using appropriate instruments.
B. CEMENTATION TECHNIQUE for metal, ceramic, fiber posts, and cast post and cores
- Tooth Preparation
- Prepare the post space according to the manufacturer’s instructions. Clean, rinse, and dry the post space thoroughly using paper points. The post space should remain dry.
- Note: Sodium hypochlorite solution is recommended for chemical cleaning of the post space. Do not use H²O² or EDTA, as these products may reduce bond strength.
- Post Preparation
- Ensure the post is pretreated and handled according to the manufacturer’s instructions.
- Dispensing & Cementation
- Before dispensing for the first time or after long intervals between use, bleed the pastes from the syringe.
- Attach a GC Automix Tip for endo as described in A 3b).
- Apply the extension tip to the mixing tip.
- Extrude material directly into the post space.
- Insert the post immediately into the post space within 1 minute after cement application.
- Note: Oral temperature accelerates the cement’s setting reaction. Ambient light may shorten the working time, so reduce light intensity or turn off the operation light during the cementation procedure.
- Keep the tip immersed in the cement while dispensing to avoid air entrapment.
- Important: Do not use lentulo spirals to place the cement in the post space, as this may shorten the working time.
- Maintain moderate pressure.
- Excess Cement Removal
- Maintain moderate pressure to keep the post in place while removing excess cement with appropriate instruments.
- In the case of a cast post and core, tack cure all surfaces for 1 second each using a visible light curing unit.
- Final Set
- While maintaining moderate pressure, light cure all surfaces and margins for 20 seconds each (Halogen/LED, intensity: 700mW/cm², covering wavelength: 430 to 480 nm).
- Let the material set for another 4 minutes. For a cast post and core, let the material set for 10 minutes.
You May Also Like
Related products

Prime Dental Restorite Desensitizer

GC Fuji & Gold Label 1 Capsules GIC
₹3,999.00 – ₹6,295.00 Select options This product has multiple variants. The options may be chosen on the product page Add to Compare
GC Everx Posterior
GC Gold Label Hybrid
")